Inquiry Learning in the Garden
Meaningful learning is often inspired by a question based in everyday experiences.
What makes a seed a seed? Do all plants need the same things? Can plants grow in the dark? Questions like this naturally sprout in a classroom garden. Nowhere is an inquiry-based learning approach more appropriate than when working with nature, plants and composting. We’ve compiled some of our favourite inquiry-learning activities and experiments below, and find even more inquiry inspiration on the Little Green Thumbs’ Pinterest board for plant experiments.
We encourage all teachers to use their classroom garden as a springboard for investigative, student-centred learning – whether a full Little Green Thumbs garden and vermicomposting bin, a single grow light or plants on a windowsill. A garden is a living laboratory where student inquiry, problem-solving, and decision-making can drive ‘hands-on, minds-on’ learning. We understand that there are many approaches to inquiry-oriented learning and teaching, and that an educators’ comfort level with such approaches are varied.
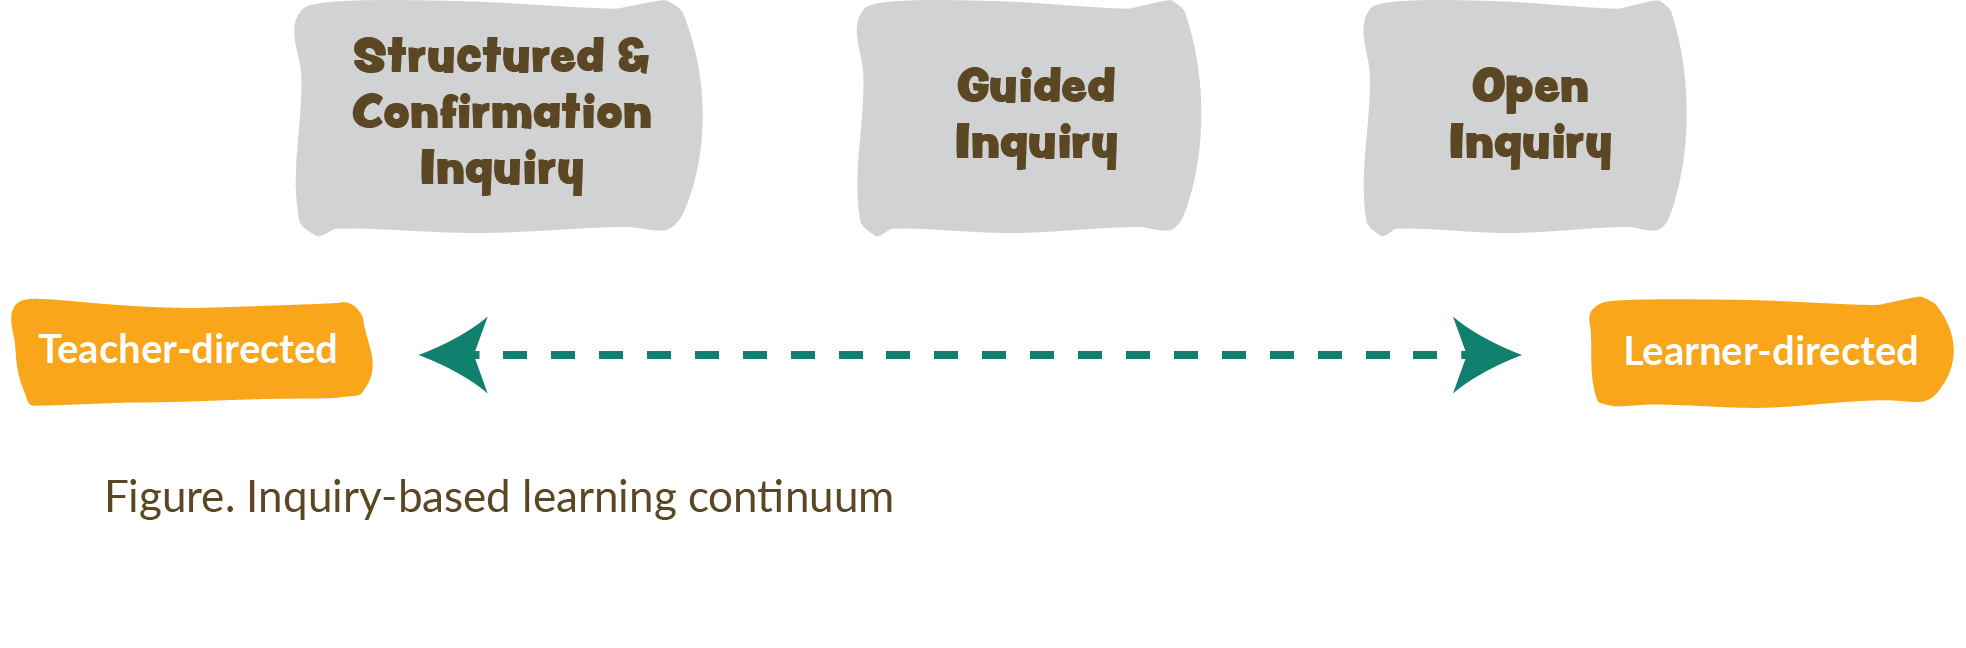
If you are new to inquiry, we encourage you to supplement your traditional instruction with opportunities for structured or confirmation inquiry. You can outline procedures, provide materials and guide students through investigation to help them discover a particular concept or relationship (ie. What’s in a seed?). On the next step along the continuum of inquiry learning, you may give students a topic and problem to investigate, and they will determine their procedures and methods (ie. Do plants need nutrients to grow?). This is guided inquiry. Moving along towards more student-driven inquiry or open inquiry, students identify their own questions, design their own investigations and reach conclusions about their evidence (ie. Can we grow a pineapple in our classroom garden?). Students will have many opportunities for questioning, observing, inferring, predicting, measuring, classifying, collecting data, analysing data, and interpreting data as they develop wonder in their classroom garden.
How does a leaf breathe?
Submerge a green leaf in water. Place your leaf in the glass in a sunny location or under your grow lights. Predict what will happen! In about an hour, look carefully at the sides of the class. Your students should see lots of tiny bubbles that have formed on the edge of the leaf and sides of glass. The bubbles you see are oxygen. Leaves take in carbon dioxide and through photosynthesis, they create food for the plant with a by-product of oxygen.
Why do plants bend towards the light?
As plants develop, they follow distinct growth and movement patterns, called tropisms. These directional movements occur in response to environmental stimuli, such as gravity, light and touch. You can demonstrate a plants ability to bend towards the light by observing the way a sunflower will turn its flower towards the light, or the way plants will bend towards the light if they are away from a window or on the edges of a grow light. This is often known as heliotropism. You can take this one step further and create a maze from a cardboard box for a bean to grow towards the light. Cut an opening at the top of the box to allow light through, and use cardboard strips within the box to block the direct path to the light. Observe as your plant navigates these obstacles to find the light!
How does water move through a plant?
Fill a few glass jars with 1 cup of water and 10 drops of food colouring. Place a celery stalk in each jar. Wait one hour (or longer for dramatic effects) and you will observe that the food colouring has travelled up the stems and coloured the leaves. You can cut the celery in half for students to view the Xylem, the tiny tubes that carry water up the stem. Try this experiment with carnations, daisies or Chinese cabbage.
What do plants need?
Consider what plant needs (light, air, water, nutrients, space) that you can isolate as a variable for a plant needs experiment. Test the effects of different amounts of light, water or nutrients on your plants. Make sure you set up a fair test by only changing one variable for the experiment. If you are testing the effects of different amounts of light, ensure that all other plant needs and conditions are kept the same.
Do plants lose water through their leaves?
Wrap a plastic bag around a branch of a well-watered garden plant. Place the plant under your grow lights or in a window in full sun. Wait one hour and observe what happens. You should begin to see water gathering in the bag due to the process of transpiration! Try measuring water loss by volume in the bag or weight of the plant. Compare different leaf shapes and plants to see if one plant releases more water than the other.